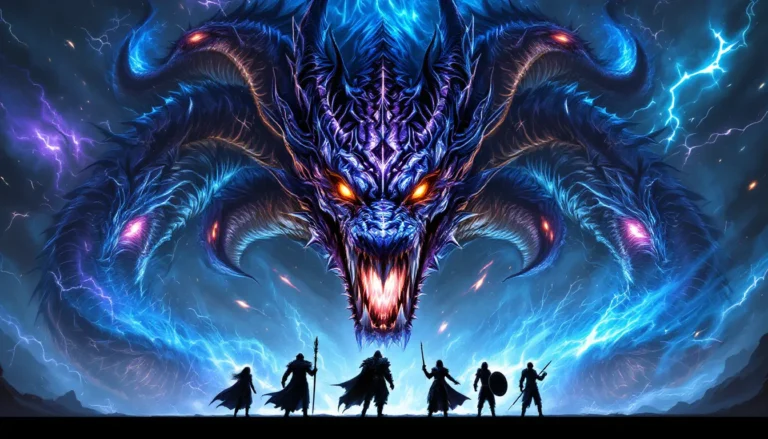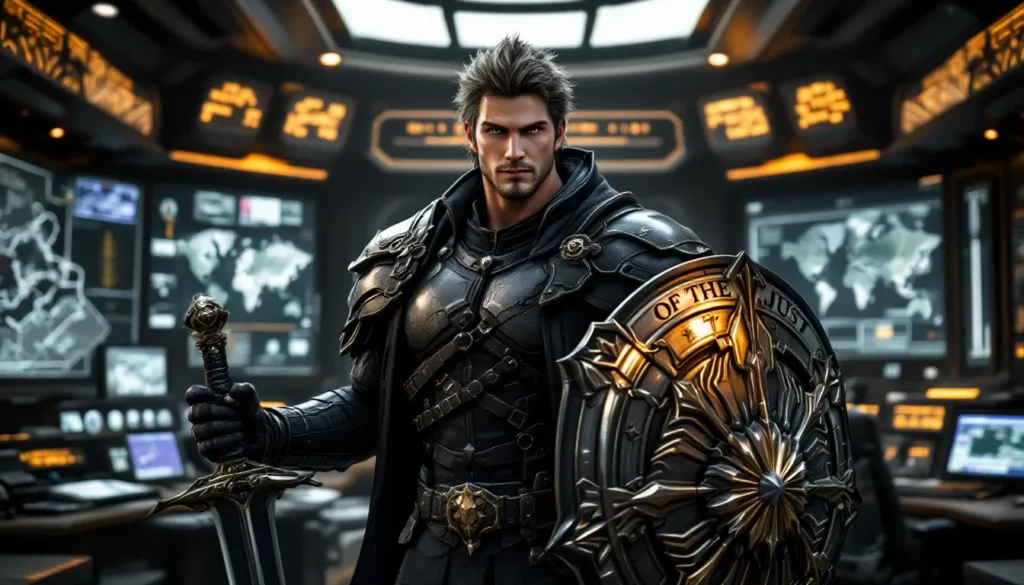
Gladiolus Amicitia is more than just a supporting character in Final Fantasy XV, he’s the tank, the protector, and arguably the most reliable force in Noctis’s party. If you’re looking to master Gladiolus and unlock his full potential, you’ve come to the right place. Whether you’re running through the campaign on Classic mode or pushing endgame content, understanding his mechanics, loadouts, and role in party dynamics can dramatically shift how you approach combat. This guide covers everything from his background and combat style to advanced strategies and DLC content, giving you the knowledge to wield the Shield of the Just like a seasoned veteran.
Table of Contents
ToggleKey Takeaways
- Gladiolus Amicitia Final Fantasy XV functions as the party’s reliable tank and protector, drawing enemy aggression through abilities like Safeguard while enabling damage dealers like Noctis to maximize their offensive output.
- Master Gladiolus’s combat style by prioritizing Strength and Vitality stats, equipping high-end greatswords like the Greatsword of the Tall, and rotating between Safeguard, Ravager, Guard, and Shield Bash based on boss attack patterns and fight phases.
- Positioning Gladiolus between enemies and squishier party members while timing guard counters at precise attack moments creates a defensive foundation that turns him into a game-changing tank across all difficulty levels.
- Episode Gladiolus DLC provides 2-3 hours of solo story content that deepens both his character arc and your understanding of his mechanical depth, including unlockable abilities like Tempest and hidden guard counter bonuses.
- Building synergy with Noctis, Ignis, and Prompto—where Glad holds aggro so others perform their roles cleanly—multiplies the party’s effectiveness far beyond individual stat optimization.
Who Is Gladiolus Amicitia?
Character Background and Role in the Story
Gladiolus Amicitia serves as the captain of Noctis’s Crownsguard and is one of the Chocobros from day one. He’s fiercely loyal to the Prince and operates as the de facto leader of the group’s security detail. Unlike the more specialized roles of Ignis and Prompto, Gladiolus is a straightforward warrior, trained since childhood to protect the Lucian bloodline and raised with a warrior’s code that prioritizes duty and strength.
In the narrative, Gladiolus’s arc centers on growth and loss. Early on, he’s confident and seasoned, the voice of reason when Noctis hesitates. But the story tests him hard. After a major turning point in Chapter 7, he vanishes from the party for a stretch, and when he returns, players see a noticeably hardened version of him. This wasn’t just downtime, it was a crucible that forged his resolve and made him more formidable in combat.
His role in the party transcends combat stats. Gladiolus represents stability and honor. Where Noctis is learning to be a leader and Ignis is the intellectual, Gladiolus embodies unwavering support. He’s the guy who always has the party’s back, literally and figuratively. This characterization directly influences how he plays mechanically, he’s built as a shield, not a glass cannon.
Gladiolus’s Combat Style and Weapon Proficiency
Mastering Gladiolus’s Sword Techniques
Gladiolus wields greatswords and broadswords with devastating efficiency. His attacks prioritize weight and impact over speed. Unlike Noctis’s rapid warp-strikes or Prompto’s ranged finesse, Gladiolus’s moves are deliberate and punishing, each swing is meant to hurt and disrupt enemies.
His core abilities revolve around a few key mechanics:
- Safeguard: His signature sustained ability that draws enemy aggression. This isn’t just flavor text, it actually makes Glad the preferred target, which is exactly where you want him.
- Ravager: A multi-hit combo that builds on his greatsword mastery. The damage scales with his Strength stat and weapon quality.
- Spinning Slash: A crowd-control option that hits multiple enemies and creates breathing room for the party.
- Berserk (unlockable): When activated, Gladiolus’s damage output becomes absolutely monstrous, but he trades defense for offense.
Weapon progression matters significantly. Early-game greatswords like the Iron Greatsword are adequate for learning his flow, but by Chapter 6, you’ll want to hunt down the Broadsword of the Mystic or craft the Balmung if you’ve got the materials. Endgame content practically demands the Greatsword of the Tall or Mage’s Masher for specific scenarios, depending on enemy weaknesses.
The timing on his combos is forgiving compared to other characters, which makes him beginner-friendly but rewarding for optimization. A skilled player chains his abilities with precision to maintain aggression while cycles through his tech points efficiently.
Shield Abilities and Defensive Tactics
Gladiolus’s defensive kit is where he truly shines. He can equip shields that grant passive stat boosts and unlock unique blocking animations. The Shield of the Just is his signature piece, thematically tied to his character arc and mechanically solid for mid-to-late game.
His defense mechanics include:
- Guard: Unlike simple defensive stances in other games, Gladiolus’s guard actually staggers incoming attacks and creates openings for counterattacks.
- Shield Bash: A tech ability that damages and interrupts enemy actions. On harder difficulties, interrupt timing is crucial, missing a shield bash can cost the fight.
- Fortification: A passive that increases his max HP and damage reduction after blocking several hits in succession.
Positioning is critical for effective defense. Glad shouldn’t be directly adjacent to magic-heavy enemies (he’ll tank unnecessary spell damage), but he should always be between range attackers and squishier party members like Ignis. On Very Hard difficulty, this positioning becomes the difference between a smooth fight and a wipe.
His HP pool is intentionally high, making him a genuine wall. With proper equipment, Gladiolus can reach 3,000+ HP by endgame, which feels meaty and lets you take risks other characters can’t afford.
Building the Optimal Glad Loadout
Essential Abilities and Techniques
Building Gladiolus for effectiveness requires balancing offense and defense. Here’s a loadout framework that works across most encounters:
Ability Priority (in order of acquisition utility):
- Safeguard – Lock this in immediately. It’s too valuable for aggro management.
- Ravager – Your primary damage source. Max this first once unlocked.
- Spinning Slash – Crowd control for group encounters. Underrated for dealing with trash mobs quickly.
- Shield Bash – Tech points permitting, this is your interrupt button. Essential for boss fights with dangerous channeled attacks.
- Berserk – Once available, reserve tech points for this. It’s a situational nuke, not a spammable button.
Tech ability usage varies by phase. Early combat: Safeguard + Ravager spam. Mid-fight when boss aggression peaks: Cycling Guard + Bash to maintain pressure. Late-stage and low-health phases: Berserk if tech points allow, otherwise Chain Ravagers for sustained DPS.
The Game8 tier lists and build guides break down ability synergies in detail if you want deep dives into specific scenarios. But the core loop is straightforward, Glad doesn’t need complex rotations to be effective.
Stat Distribution and Equipment Recommendations
Stats matter for Gladiolus, but not all equally. Here’s the hierarchy:
Stat Priority:
- Strength: Boosts greatsword damage directly. Aim for 350+ by endgame.
- Vitality: Increases max HP and mitigates incoming damage. Non-negotiable. 250+ minimum.
- Spirit: Helps with magic defense. Less critical than Vitality but relevant.
- Mind: Dead last for Gladiolus. Not his stat.
Equipment Setup for Standard Endgame:
| Slot | Recommended Gear | Alternative |
|---|---|---|
| Weapon | Greatsword of the Tall | Balmung |
| Shield | Shield of the Just | Aegis Shield |
| Head | Royal Helm | Genji Helm |
| Torso | Mythril Mail | Maximilian Armor |
| Gloves | Magitek Gloves | Bronze Gauntlets |
| Feet | Treads of the Wanderer | Genji Boots |
Accessories should lean into survivability. The Ring of Lucii offers magic negation which is helpful, but Grand Chamberlain Ring for flat Vitality or Founder’s King’s Ring for balanced stats are safer picks.
For spells (yes, Glad can equip them), stick to support magic. Draw from your magic stock and use Protect before major boss phases and Fortify if you anticipate physical spam. Avoid investing in offensive spells, that’s not his lane.
Weapon enhancement is where the real stat gains come from. Upgrading the Greatsword of the Tall to its final form costs significant materials, but the Strength bonus pushes it to roughly 400 base damage, making every hit count.
Gladiolus in Party Dynamics
Synergy with Noctis, Ignis, and Prompto
Gladiolus’s value multiplies when synergized properly with the rest of the Chocobros. Each character brings different tools, and Glad’s defensive anchor role only works if the others play their part.
With Noctis (the offensive engine): Gladiolus draws attention while Noct does the heavy lifting with warp-strikes. This dynamic is the backbone of combat. If Glad isn’t holding aggro, Noctis becomes the target, which is dangerous. A strong Safeguard rotation ensures Noctis gets the breathing room to maximize his damage.
With Ignis (the support / analysis role): Ignis’s role is buffs, debuffs, and positioning enhancements. When Glad keeps boss attention, Ignis can land clean debuffs like Demotion or buff chains like Enchant without interruption. Synergy here is about Ignis not getting targeted, let Glad tank the early aggro while Ignis sets conditions for team-wide boosts.
With Prompto (the ranger): Prompto’s ranged attacks function best when he’s not the focal point. With Glad tanking, Prompto can hang back and deliver consistent damage without worrying about evasion or getting mobbed. Prompto’s ammo usage also improves, he doesn’t have to waste shots retreating if Glad holds the line.
The synergy extends to Link abilities. When Gladiolus reaches max relationship level with Noctis, their Link Ability Armiger Chain becomes available, a devastating synchronized attack that hits several times consecutively. This is one of the hardest-hitting team moves in the game.
Positioning and Combat Rotation Strategies
Positioning Fundamentals:
- Primary Tank Role: Glad should be within melee range of the boss, slightly offset to allow Noctis to circle freely.
- Group Encounters: Position Glad between the group and incoming threats. Literal human shield.
- Ranged-Heavy Bosses: Pull Glad slightly back so ranged attacks don’t chain on him unnecessarily. Single-target ranged patterns can be tanked: AoE patterns benefit from distance.
Combat Rotation Strategy (applicable across most encounter types):
- Opening Phase (first 30% of fight): Activate Safeguard immediately. Execute 2-3 Ravager combos to build damage and establish threat.
- Mid Phase (30%-60%): Cycle between Guard and Ravager based on boss attack pattern. If the boss channels dangerous attacks, have Shield Bash ready. Use Spinning Slash only if Prompto needs backup against adds.
- Critical Phase (60%+ onward): Maintain Safeguard. Transition to more defensive Guard cycles if health dips below 50%. If tech points are available and the fight is close, save Berserk for a final burst.
Timing is everything. Unlike turn-based systems, FFXV requires reading enemy animations. Boss patterns are learnable, and once you know when big attacks come, positioning Glad to absorb them becomes second nature.
On Very Hard difficulty, your rotation tightens significantly. There’s less room for exploratory combat, you’ll be reacting to specific tells. Glad’s forgiving mechanics mean new players can learn on him while veterans optimize for frame-perfect guards and tech timing. That’s good design.
Advanced Combat Tips and Strategies
Boss Fight Tactics and Notable Encounters
Several boss encounters highlight Gladiolus’s strengths or expose his weaknesses. Understanding these matchups separates casual players from optimizers.
Difficult Matchups for Glad (where defensive tanking struggles):
- Lich (Post-story optional boss): Heavy magic damage that ignores physical defense. Mitigation strategy: Equip Ring of Lucii for magic nullification and rely on Protect spells rather than shield mechanics.
- Somnus (Final DLC boss if you own Gladiolus’s Episode): Pure elemental attacks demand positioning flexibility. Here, Glad can’t just stand and tank, he has to actively dodge and counter.
Ideal Matchups (where Glad excels):
- Ravus (mid-story boss): Melee-focused fighter. Safeguard locks him into aggression patterns you can predict and punish with Shield Bash interrupts.
- Ardyn (final campaign boss, specific phase): When Ardyn relies on physical strikes, Glad becomes invaluable for holding him in place while Noctis chains damage.
- Psychomancer (optional boss): Relies on AoE status attacks. Glad’s high Vitality and shield mechanics reduce effectiveness, this fight is relatively forgiving with him in the party.
For any boss fight, the formula is: Identify the attack pattern, position Glad accordingly, use interrupts on dangerous abilities, and let damage dealers focus on DPS. This isn’t glamorous, but it wins fights.
Secret Techniques and Unlockable Abilities
Gladiolus has hidden depths that reward exploration and grinding.
Unlockable Abilities (requires specific conditions):
- Raging Fang: A high-risk, high-reward ability that requires sustained aggression. Activate by hitting the enemy with Ravager consecutively (4+ hits without interruption). Damage scales with this combo counter.
- Tempest (Post-game): Unlocked by completing the Gladiolus Episode DLC or reaching specific stat thresholds. A massive area attack that hits everything on screen. Use sparingly, tech point cost is steep.
- Arminger Technique (exclusive to Gladiolus’s Episode): A story-driven technique that ties to his character arc. Won’t spoil it, but it’s worth experiencing.
Hidden Mechanics:
- Guard Counter Bonus: When Glad blocks at the precise moment an attack lands (not early, not late), the next tech ability costs 20% fewer tech points. Skilled players extend Glad’s tech point economy significantly.
- Weapon Enchantment Scaling: Shields benefit from Strength enchantments more than you’d expect. A fully enhanced shield can boost damage by 8-12% even though shields are defensive items.
The Twinfinite guide section has walkthroughs of hidden unlocks and how-to guides for discovering these mechanics organically. Some players miss these entirely, which is why Glad feels more powerful once you dig into his depth.
Optimizers min-max Strength stat early and unlock Raging Fang by Chapter 10. Casual players discover it accidentally much later. Either approach works, Glad’s forgiving design means you’re viable regardless.
Gladiolus DLC Content and Additional Story
Final Fantasy XV released as an incomplete experience, but subsequent patches and DLC filled significant gaps. Gladiolus got dedicated story content called Episode Gladiolus, which bridges the narrative gap where he disappears from the main party.
Episode Gladiolus Overview:
This is a standalone chapter where Gladiolus takes center stage. The DLC runs approximately 2-3 hours depending on difficulty and exploration. It’s set during his absence from the main story, following his encounter with Cor the Immortal, the legendary general who trained him. Their clash becomes a personal reckoning, testing Glad’s resolve and physical strength.
Gameplay-wise, Episode Gladiolus is a dungeon-heavy experience. Unlike the open-world emphasis of the base game, this DLC strips away party mechanics entirely. You’re playing solo Glad, which fundamentally changes combat. Without Ignis buffs or Noctis burst damage, you’re learning to survive on positioning, timing, and pure mechanical skill. This is where the hidden mechanics mentioned above shine, guard counters, interrupt timing, and tech point economy become make-or-break.
Story Significance:
The DLC recontextualizes Glad’s return to the party. When he rejoins after this Episode, you’re seeing a hardened warrior who’s faced genuine adversity. His character model even changes slightly, and his dialogue carries more weight. For completionists, this DLC is essential. For casual players, it’s supplementary but enriches the narrative.
Rewards and Carry-Over:
Equipment and abilities earned in Episode Gladiolus can be transferred to the main game. The Tempest ability mentioned earlier comes from this DLC. Also, completing it on higher difficulties unlocks alternate costumes and weapon skins that carry over.
Note: Episode Gladiolus requires separate purchase on most platforms. It’s not included in the base game. On Steam, PS4, and Xbox, it’s typically 4.99–9.99 USD depending on region and current sales.
Recent coverage from Siliconera on JRPG DLC trends highlights how Episode Gladiolus set a precedent for character-focused story expansions in the franchise. It’s regarded as one of the better add-ons to XV.
Conclusion
Gladiolus Amicitia embodies tank gameplay at its finest, reliable, impactful, and deeper than surface inspection reveals. He’s the character who lets others shine while making his own statement through discipline and power. Whether you’re progressing through the campaign on Normal difficulty or tackling Malboro hunts on Very Hard, understanding his mechanics, loadouts, and role gives you a significant advantage.
The journey with Gladiolus spans his character arc in the main story, deepens through Episode Gladiolus’s personal reckoning, and continues in endgame content where optimized builds truly matter. New players can succeed with basic understanding, position him in front, keep Safeguard active, and let him block. Veterans can extract frame-perfect guards, chain ability rotations, and coordinate Link Abilities for devastating synchronized strikes.
Final Fantasy XV’s combat system rewards this kind of flexibility. Glad isn’t the flashiest character or the hardest hitting, but he’s arguably the most essential. A party without tank discipline falls apart against challenging content. Master Gladiolus, and you’ve mastered the foundation that lets the entire team perform.